Rope Spool Plant Stand Upcycle
Hi friends! It’s time again for the monthly At Home DIY challenge. Today we are sharing our “build it for less that you’d buy it” furniture projects. I’m making a rope spool plant stand. I can’t wait to see what my blogging buddies have done this month! Be sure to check out the link to all of the projects at the end of this post. A big shout out to Eileen from Just Measuring Up and Megan from Two Feet First for coordinating these challenges. Thank you ladies!
Let me just start by telling you that I almost opted out of this challenge. I am not a woodworker and I have a healthy fear of power tools. But, part of my blogging journey has been to push myself out of my comfort zone. So I was prepared to handle a jigsaw (with guidance from my stepdad) to complete my rope spool plant stand project. I found my inspiration piece from Ballard Designs.
The inspiration piece is actually a side table, and it retails for $249.00. I had the idea to create a similar table by wrapping rope around a large plastic bucket, and gluing circles of plywood to the top and bottom of the bucket. I bought the supplies I needed and I was ready to get started.

Then I was having coffee with a friend and I asked her if she knew where I could buy rope. She told me about a marine discount store where she’d bought rope before. I went right over there, and suddenly my plans changed…
The rope was sold on large spools! There were spools of rope from floor to ceiling. When I told a salesman what I was doing, he informed me that they discard the spools once they’re empty. Then he offered me a spool, for free! I couldn’t believe my luck!

As if that wasn’t lucky enough, I also had enough rope in my stash to wrap around the spool. So far my investment for this project was $0. I returned the bucket and plywood…my adventures with a jigsaw will have to wait!

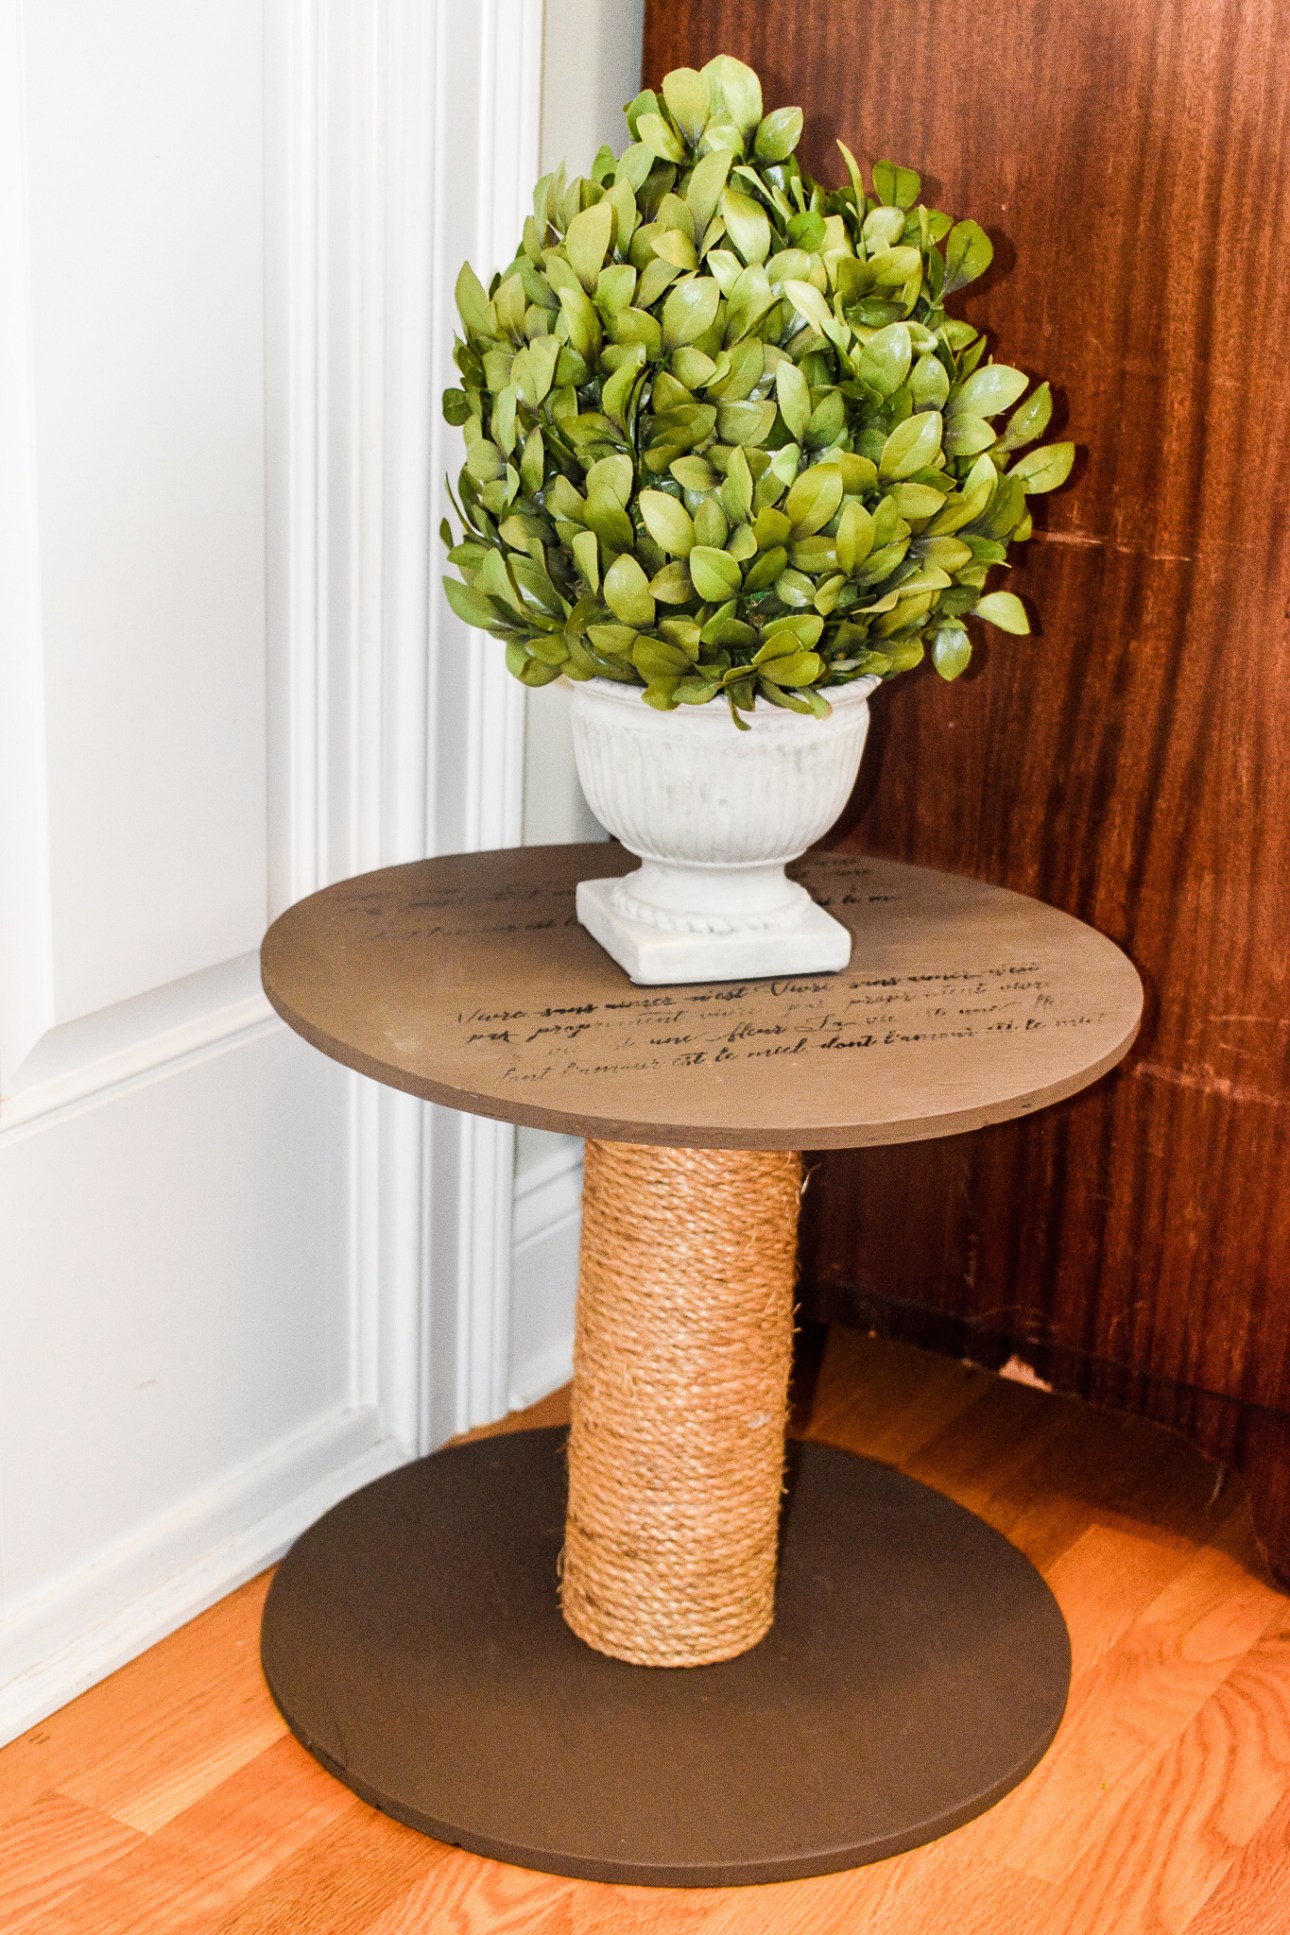
As you can see, my spool is a lot skinnier than the inspiration piece. It’s also shorter, hence it became a rope spool plant stand instead of a rope spool side table. For prep, I removed the sticker on top with Goo Gone. Although stain was used on the inspiration piece, I needed something darker to cover the rope brand information.
Step 1.
Paint all sides of the plywood. I chose Dixie Belle Mineral Chalk Paint in Chocolate. I applied two coats and it covered the advertising completely.


Step 2.
Wrap the rope around the middle of the spool. I put a pole through the holes in the spool and placed it between the handrails in our garage. This allows you to spin the spool while you’re wrapping it with rope. Begin by securing the rope to the end of the spool with hot glue.

As you wrap the rope around the spool, keep it pulled tight.

Dab some hot glue between the rope after every 4-5 turns.

When you get to the end, cut off the excess rope. To prevent it from unraveling, apply a generous amount of hot glue.

Pull the rope as close to the spool as possible, and secure to the plywood with hot glue.

Step 3.
Add a stencil. I chose a French Script Mesh Stencil from A Maker’s Studio. I have no idea what it says, but it looks pretty LOL! While these stencils are usually used with a chalk paste and can be washed off, I used black paint instead. You can purchase A Maker’s Studio stencils and other products through my friend Carol’s website Bluesky at Home.

Position the stencil where you want it on the top of the spool. Mesh stencils have an adhesive to keep them in place.

If you have chalk paste, you can apply it to the mesh stencil with a spreader and seal it with a top coat to make it permanent. Because I used black paint, I used the traditional stencil method. I dipped my stencil brush in paint, then off loaded most of the paint onto a piece of cardboard. Then I dabbed it onto the stencil.

And here is how it looks! There are a few places where the stencil isn’t as bold. There was also a little bit of bleed through. But I thought it gives it an aged, imperfect character, which is what I like in my furnishings.

So, I was pretty happy that I was able to make this plant stand for only the cost of paint! It doesn’t look just like the Ballard Designs piece, but it has a similar vibe. I have a feeling that I’ll be going back to the marine store in the future to see if they have any more spools destined for the trash.

You may recognize the faux plant…I borrowed it from my front entry!
I hope you found some inspiration from my rope spool plant stand. If nothing else, it shows that you really can turn trash into treasure!
If you like painted furniture, check out my side table, mirror, stool, bookcase and dresser makeovers!
Thanks for stopping by today! Now be sure to check out what all of the other At Home DIY Participants have been up to this month!
All the best,
Rebecca


This is really a fun task. I love this upcycle. The design is outstanding. Do you have any YouTube channel to see these types of projects?
This is the most easy to make, yet beautiful stand I have ever seen. The rope looks amazing. The plants will look too good n this. This is the perfect plant stand anyone can have. Thanks for this beautiful design.
Thank you for your kind words Mariah! It’s amazing what you can make with something that otherwise would’ve ended up in the trash!
I love this, Rebecca! So awesome how you got the spool for free – but I also love the bucket idea! 🙂
Thanks Eileen! With your carpentry skills, the bucket option would be a piece of cake!
Love your site!
Such a fun upcycle! I love the french script stencil that you use and the rope effect!
Thank you so much for sharing your fun project over at Waste Not Wednesday!
Congratulations! Your post was my Most Clicked at #OverTheMoon this week. Visit me on Sunday evening and to see your feature! I invite you to leave more links to be shared and commented upon. https://www.marilynstreats.com. Please be sure to leave your link number or post title so we can be sure to visit!
I absolutely love this tutorial, Rebecca! My husband always has leftover cable spools from work and this is the perfect project to turn them into something beautiful. Great post!
Thank you for sharing at #OverTheMoon. Pinned and shared.
What a fabulous project, Rebecca! I love making knock-off decor that looks designer. Yours turned out so well! Thanks for joining us at Tuesday Turn About!
Thanks Crissy! I got so lucky when I found that discarded spool!
Fun project and looks professionally finished. Thanks for sharing on Tuesday Turn About!
Thanks Michelle! This was a fun project!
I LOVE this project. It is the perfect accent piece that works across so many decor styles!! Thank you for sharing!
Thanks Jessica! It was a fun project!
Oh my gosh you totally scored at that store and your table is beautiful. You should get all their discarded spools and start making and selling this little tables. Or just sell the empty spools, lots of people would buy them, including me. Runs out to look for a local marine discount store 😀
Thanks Toni! I had the same thought. I’m going to put this one in my antique booth and see if it sells. You should definitely check out your local marine store!