How to Give a Neutral Pillow an Easy and Temporary Fall Update
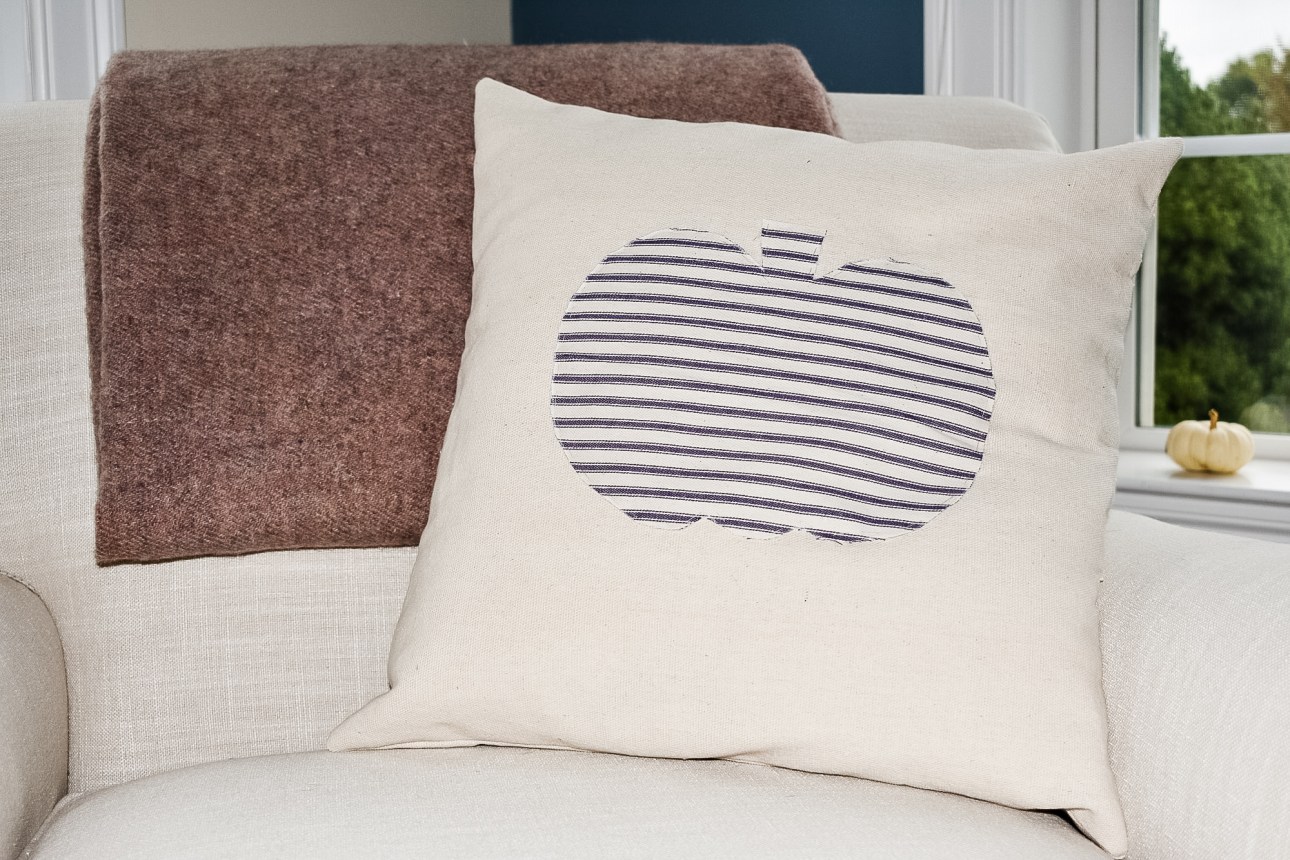
Neutral Fall Pumpkin Pillow
Note: This post contains affiliate links. If you click one of my links and make a purchase, I will receive a small commission but it will not cost you a penny more.
Hi friends! Have you finished decorating your homes for fall? I just bought some mums yesterday that I’ll use to replace my summer annuals. I need to stock up on pumpkins for the front porch, as well. Inside, I decorated the living room mantel, but I wanted to add a little more seasonal flair to the room.
I brought in some vintage wool blankets to drape over the couch and chairs. In keeping with the neutral vibe of the fall mantel, I decided to make some pillows out of a drop cloth. I had some pillows on the chairs, but they’re an embroidered floral pattern that was part of my summer decor. I knew that I wanted to add a fall accent to the pillows, but it had to be neutral. No orange this time. I wanted a neutral fall pumpkin pillow design.
So I looked through my fabric stash and decided to sew on a pumpkin design with a classic blue and off-white ticking stripe. As I started to prepare for this project, it occurred to me that the drop cloth pillows provide somewhat of a decorating “blank slate”. I could reuse these pillows each season with just a few changes. I’ll remove the pumpkin and add something new for the winter holidays. Then I don’t have bulky “fall” pillows that need to be stored until next season. Win win!
So here’s how I made my pumpkin pillows. I made a simple envelope style pillow out of painter’s drop cloth You can find similar ready made pillows at home stores. Or you can buy covers and inserts separately at craft stores. You may even already have a plain pillow or two on hand.

WHAT YOU’LL NEED:
- Solid colored pillow (mine is 18×18)
- fabric of your choice (mine is cotton ticking)
- pumpkin template (I printed mine for free from firstpalette.com and enlarged it to 121%)
- scissors
- pins
- needle and coordinating thread
- chalk pencil
Step 1.

Position the template onto the fabric (right side up) and trace the pumpkin template with the chalk pencil.
Step 2.

Cut out the fabric pumpkin
Step 3.
Place the pumpkin (right side up) onto the pillow and pin in place.
Step 4.

Sew the pumpkin to the pillow using a running stitch. Remove pins and you’re done!

If you want a no-sew option, try attaching the pumpkin to the pillow with hem strips or stitch witchery. You can find these at fabric & craft stores.
I love the way the running stitch looks. If the fabric frays a little, that just adds to the casual look. And the best part? It’s very easy to remove when it’s time to refresh your decor. Just take out the stitches with a seam ripper and you’re ready to start over.


I hope you liked my neutral fall pumpkin pillow. Thanks for stopping by!
Rebecca


Great idea, turned out nice! Thanks so much for linking up at #AThemedLinkup 1.
What a sweet idea, Rebecca! I like the idea of a temporary makeover so you don’t have to run out and buy new pillows just for fall. Thanks for sharing at Tuesday Turn About!
Thanks Crissy! It’s a quick and easy project!
This is so cute Rebecca! Pinning!
Thanks Jessica! So glad you stopped by 🙂
Thanks Christina!
Such a great idea!
Such a great idea!